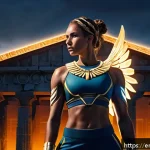
Hey, fellow Commanders! Ever wanted to immortalize those breathtaking moments in Nikke: Goddess of Victory, only to end up with a screenshot that just doesn’t quite capture the magic?

I know the feeling – I’ve spent countless hours in game, trying to freeze that perfect skill animation or showcase my favorite Nikke’s stunning design, only to miss the mark.
It can be frustrating when you’re aiming for that ‘wow’ factor to share with friends or just for your own collection, right? But what if I told you that turning your in-game captures into gallery-worthy art is actually much simpler than you think?
I’ve gathered all my best discoveries and tested strategies, and I’m genuinely excited to share how you can elevate your screenshot game from amateur to absolute pro.
Let’s get into the nitty-gritty below and make every shot count!
Unleashing Your Inner Artist: Mastering Composition
Alright, Commanders, let’s dive straight into making those Nikke screenshots truly pop! For years, I struggled with shots that felt… flat. My Nikkes looked amazing in game, but when I hit that capture button, something was always missing. It felt like I was just pointing and shooting, and the magic just wasn’t translating. What I eventually realized was that it all comes down to composition, just like a real photographer. It’s about how you arrange everything within your frame to create a visually appealing image. I mean, we spend so much time building our dream squads and admiring these incredible designs, so why not showcase them in the best light possible? Trust me, once you start thinking about where your Nikke is placed, what’s in the background, and how you create depth, your screenshot game will elevate instantly. It’s not about expensive software or complicated techniques; it’s about a few simple principles that will make you look at your screen differently. I genuinely get a thrill now when I snap a picture and it looks exactly like I envisioned it, sometimes even better!
Framing Your Nikke: The Rule of Thirds for That ‘Pro’ Look
One of the easiest and most effective composition tricks I’ve picked up, and one that absolutely revolutionized my Nikke screenshots, is the “Rule of Thirds.” Imagine your screen is divided into nine equal sections by two horizontal and two vertical lines, creating four intersection points. Instead of plonking your Nikke right in the middle (which can often make a shot feel static and a bit boring, if I’m being honest), try positioning them along these lines or, even better, at one of the intersection points. It instantly adds dynamic energy and a more professional feel to your image. I remember one time I was trying to get a perfect shot of Scarlet in her default pose, and it just wasn’t hitting. I shifted her slightly to the left, aligning her with a vertical line, and suddenly, the shot felt balanced and captivating. It gives the viewer’s eye a natural path to follow, making your capture much more engaging. You’ll be surprised how much of a difference this simple adjustment makes to your visual storytelling.
Background Bling: Choosing the Perfect Stage for Your Shot
Just as important as your Nikke themselves is the environment they’re in. A busy, cluttered background can completely detract from your subject, no matter how stunning she looks. I’ve been there, trying to show off a new skin, only for my friends to ask about the random debris in the corner! My go-to strategy now is to always consider the background. Sometimes, it’s about finding a spot with a simple, clean aesthetic, like a clear sky in the Outpost or a monochrome wall in the Ark. Other times, it’s about using the environment to enhance the Nikke’s theme. For instance, if I’m showcasing a water-element Nikke like Mast, I’ll try to find a stage with reflective surfaces or flowing water. Experimenting with different chapters and event stages can yield incredible backdrops. Remember, the background shouldn’t compete with your Nikke; it should complement her, adding context or simply providing a beautiful, unobtrusive frame. It’s all about creating harmony in your image, making sure every element contributes to the overall appeal without overwhelming the main star.
Depth and Dimension: How to Make Your Nikke Pop
Ever notice how some screenshots just have that ‘wow’ factor, where the Nikke seems to almost jump out of the screen? That’s all about creating a sense of depth and dimension. It’s a trick I’ve been honing for ages, and it completely transforms a flat image into something incredibly engaging. My secret? Playing with elements in the foreground and background. Think about using a subtle environmental object slightly out of focus in front of your Nikke, or ensuring there are distant elements that give a sense of vastness. Sometimes, just a slight tilt of the camera or a specific angle can make a huge difference, making it feel less like a 2D image and more like a captured moment from a living, breathing world. It’s about layering your shot. For example, if you’re taking a shot in a corridor, position your Nikke slightly off-center and let the hallway extend into the background. The lines of the corridor naturally draw the eye, giving that desired depth. The game’s beautiful environments are designed to have this, so it’s just a matter of finding and emphasizing it in your frame. It really makes your Nikke the undisputed star of the show.
The Devil’s in the Details: Perfecting Your In-Game Settings
When I first started taking Nikke screenshots, I thought it was all about timing and composition. Boy, was I wrong! I spent so much time perfectly posing a Nikke, only to realize later that the in-game display elements were ruining the shot, or the resolution just wasn’t cutting it for sharing on my social feeds. It was genuinely frustrating, and I kept thinking, “There has to be a better way!” What I eventually discovered is that the game itself offers a treasure trove of settings that, when tweaked just right, can elevate your screenshots from casual captures to genuine works of art. It’s all about digging into those menus and understanding what each option does. I’ve personally found that dedicating a few minutes to adjust these settings before a serious screenshot session makes a monumental difference. It’s like preparing a canvas before painting a masterpiece – you want everything to be perfect before you even start.
Beyond Auto: Tweak Your Visuals for Maximum Impact
Leaving your graphics settings on “Auto” might be convenient for gameplay, but trust me, it’s not doing your screenshots any favors. I learned this the hard way, with blurry edges and less-than-vibrant colors. To get those crisp, high-definition shots that truly showcase Nikke’s incredible art style, you absolutely need to dive into the graphics settings. I always set my “Image Quality” to “Highest” and ensure “Display Resolution” is at its maximum. Don’t forget about “Frame Rate” – while not directly impacting a static screenshot, a smoother visual experience during capture can help you time your shots better, especially for dynamic animations. My personal preference is to also turn on “Anti-Aliasing” if my device can handle it, as it smooths out jagged edges and makes everything look much more polished. It might put a little more strain on your device, but for those gallery-worthy shots, the visual fidelity boost is absolutely worth it. It’s the difference between a good shot and an absolutely stunning one.
Hiding the UI: Clean Shots for Clean Feels
This is probably the most crucial tip for professional-looking screenshots: get rid of that pesky user interface! Nothing ruins a beautiful Nikke capture faster than seeing health bars, skill icons, or chat boxes plastered all over it. I mean, we want to appreciate the art, not the HUD, right? Nikke actually has a built-in “Hide UI” option, and it’s your best friend for clean, unobstructed views. I make it a habit to always toggle this off before taking any serious screenshot. It instantly transforms your screen into a pure canvas for your Nikkes. If you’re in a specific menu like the character viewer or an event stage, sometimes you might need to tap the screen or look for a small icon that hides the interface elements. My personal workflow involves hitting that UI toggle, pausing for a second to let any lingering animations finish, and then taking the shot. It creates a much more immersive and shareable image, making it look like it came straight from a concept art book rather than a busy game screen. It’s a small step, but it makes a colossal difference.
Character Model Viewer: Your Secret Weapon for Poses
Hands down, the Character Model Viewer is an absolute game-changer for capturing those exquisite details and perfect poses. I used to rely solely on the main screen or battle stages, trying to pause at just the right moment. The frustration was real when I’d miss that perfect hair flip or subtle expression! But in the Character Model Viewer, you have so much control. You can rotate your Nikke, zoom in and out, and even select different animations or idle poses. It’s like having your own personal photo studio for each Nikke. I’ve spent countless hours here, meticulously adjusting angles to highlight a specific outfit detail or to get that perfect close-up of a Nikke’s eyes. It truly allows you to get creative without the pressure of fast-paced action. Plus, many Nikkes have unique idle animations that you might not even notice during regular gameplay, and this is the perfect place to capture them. If you’re serious about showcasing your favorite Nikkes in all their glory, this mode is your ultimate secret weapon. It’s where I get some of my absolute favorite profile pictures!
Timing is Everything: Capturing Dynamic Moments
You know that feeling when a Nikke unleashes her Burst Skill, and the screen just explodes with incredible animations and effects? It’s pure visual candy! But trying to capture that split-second perfection in a screenshot? That’s where things get tricky, and where I, for a long time, hit a wall. My early attempts often ended up as a blurry mess or I’d miss the most impactful part of the animation entirely. It’s a delicate dance between anticipation and quick reflexes, and it genuinely took me a while to get the hang of it. What I’ve learned is that it’s not just about snapping a picture; it’s about understanding the rhythm of the game, anticipating the peak of the action, and being ready to freeze time. It’s incredibly rewarding when you finally nail that epic skill shot, making your Nikke look like the true goddess of victory she is. This is where your ‘player experience’ really shines through in your screenshots.
Burst Skills in Action: The Art of the Split-Second Freeze
Capturing Burst Skills is an art form in itself, and it’s probably where I’ve put in the most “practice” time. Every Nikke’s Burst is unique, with its own visual flair and timing. My number one tip for this is to observe the animation a few times without even trying to screenshot. Learn the exact moment the most visually stunning effect appears, or when the Nikke strikes their most powerful pose. Sometimes it’s right at the beginning, other times it’s halfway through, or even at the very end. Once you’ve got that timing down, it’s about being quick on the draw with your screenshot button. I often use screen recording software to capture the entire Burst, then go back and scrub through the video frame by frame to find that absolute perfect moment. Then, I simply take a high-quality still from the recording. This method has saved me so much frustration and resulted in some of my most breathtaking captures. It’s a little extra effort, but the results are always worth it, turning fleeting moments into timeless images.
Idle Animations and Expressions: Showing Off Their Personality
While flashy Burst Skills are undeniably cool, there’s something incredibly charming about capturing a Nikke’s more subtle moments: their idle animations and expressions. These are the details that truly bring their personalities to life, showcasing their unique quirks and moods. I love watching how different Nikkes fidget, adjust their hair, or offer a slight smile when you leave them on the home screen. It feels like getting a glimpse into their true selves. The trick here is patience. These animations often loop, so you’ll have plenty of chances to capture them. Focus on their facial expressions – a subtle smirk, a thoughtful gaze, or even a determined frown can make for a powerful image. The Character Model Viewer is also fantastic for this, as you can let them idle without any distractions. I often find myself just watching them for a bit, waiting for that perfect blink or head tilt. These shots, while not as explosive as a Burst, often resonate more deeply because they capture the essence of the character we’ve grown to love. They’re perfect for profile pictures or just appreciating the incredible work of the artists.
The Perfect Angle: Experimenting with Camera Perspectives
Getting the right angle can completely change the mood and impact of your screenshot. I used to stick to eye-level shots, thinking that was the safest bet, but my images always felt a bit generic. What I’ve learned from countless hours of experimenting is that playing with different camera perspectives is key to adding drama, emotion, or a unique viewpoint. Try a low angle to make your Nikke appear more imposing and powerful, emphasizing their heroic stature. A high angle, on the other hand, can make them seem more vulnerable or offer a broader view of the environment. Sometimes, I even go for extreme close-ups to highlight intricate details of their outfit or a specific facial feature. For instance, a shot looking up at Liter from a low angle during her Burst makes her seem even more formidable despite her small stature. Don’t be afraid to move the camera around, zoom in and out, and tilt it slightly. The in-game camera offers a surprising amount of flexibility if you just explore it. It’s all about finding that perspective that tells the story you want to convey about your chosen Nikke.
Post-Capture Polish: Elevating Your Images After the Click
So, you’ve nailed the timing, perfected the composition, and cleared the UI. You’ve got what you think is a fantastic raw screenshot of your favorite Nikke. But here’s a little secret I’ve picked up over my years of sharing captures: even the best in-game shots can be significantly improved with a little post-capture love. It’s like taking a beautifully recorded song and then doing a bit of mastering to make it truly shine. When I first started, I thought taking the picture was the end of the process, but I quickly realized that a few quick edits can transform a good image into an outstanding one, making it ready for any social media feed or personal collection. I’m not talking about complex Photoshop skills here; I mean simple adjustments that are available in almost any free photo editing app on your phone or computer. These minor tweaks can bring out colors, clarify details, and generally make your Nikkes look even more phenomenal than they already do. It’s the final touch that makes your work truly stand out.
Basic Edits That Make a Huge Difference: Brightness, Contrast, Color
Honestly, the holy trinity of basic photo editing for Nikke screenshots, in my humble opinion, is brightness, contrast, and color adjustments. I’ve found that even with the best in-game settings, a screenshot can sometimes look a little dull or washed out. A slight bump in brightness can make your Nikke pop, especially if the original scene was a bit dark. Then, playing with contrast can add depth and definition, making the intricate details of their outfits and weapons stand out. But my personal favorite is tweaking the color. Sometimes, just a slight saturation increase can make those vibrant blues, reds, or purples in a Nikke’s design absolutely sing. Be careful not to overdo it, though! A subtle touch is all you need to bring out the richness without making it look unnatural. I usually open my captures in a simple photo editor, make these three adjustments, and often, that’s all it takes to elevate the image significantly. It’s like giving your Nikkes a fresh coat of paint – they just look so much livelier!
Cropping for Impact: Focusing on What Matters Most
After taking a screenshot, especially if it was during intense combat, you might find some unnecessary elements at the edges. Or maybe you captured a wider scene but truly want to emphasize just your Nikke’s face or a specific part of her design. That’s where cropping comes in as your best friend. I can’t tell you how many times I’ve taken a “decent” screenshot and then, with a simple crop, transformed it into something truly impactful. Cropping allows you to eliminate distractions and direct the viewer’s eye exactly where you want it to go. It’s about refining your composition even after the fact. For example, if you want to showcase a Nikke’s new outfit, you might crop out the battlefield elements to focus solely on her silhouette and details. Or if you’re trying to capture an intense facial expression, a tight crop around her face can create a powerful emotional punch. Don’t be afraid to experiment with different crop ratios too – sometimes a vertical crop works better for mobile sharing, while a wider aspect ratio suits a desktop wallpaper. It’s all about making your star the absolute center of attention.
Sharpening and Filters: Adding That Extra Sparkle (Subtly!)
This is where you can add that final, professional gleam, but with a huge caveat: subtlety is key! A tiny bit of sharpening can make the textures on your Nikke’s uniform or the details on their weapon appear crisper and more defined. I usually apply a very light sharpen filter – just enough to make things pop without creating harsh, unnatural edges. Over-sharpening is a common rookie mistake that can make your image look pixelated and fake, so always dial it back. As for filters, they can be a double-edged sword. While it’s tempting to slap on a dramatic filter, I generally advise against anything too heavy-handed. Instead, if I use a filter at all, I opt for very subtle ones that enhance the mood or color grading without drastically changing the original art style. Think of a slight “vibrance” boost or a touch of a “cool” or “warm” tone to match the Nikke’s aesthetic. My goal is always to enhance, not overpower, the incredible original artwork. A little bit of thoughtful polish goes a long way to making your captures truly gallery-worthy.
Showcasing Your Collection: Themes and Storytelling
Once you start consistently getting those gorgeous Nikke screenshots, you might find yourself with a growing collection, just like I did! And that’s where the real fun begins: thinking about how you can group them, create themes, and even tell little stories with your images. It’s no longer just about individual shots; it’s about curating an experience. I’ve personally found that having a theme in mind before a screenshot session helps immensely. Instead of just randomly snapping pictures, I think, “Today, I want to capture my favorite ‘Pilgrim’ Nikkes in action,” or “I want to show off all my ‘electric’ element Nikkes in a cool, sci-fi setting.” This approach not only makes the process more enjoyable but also results in a much more cohesive and impressive collection. It elevates your individual captures into a narrative, making your social media posts or personal albums feel more intentional and engaging. People love seeing a series of related images, it just tells a better story and keeps them scrolling!
Squad Goals: Group Shots That Tell a Tale
It’s one thing to get a fantastic solo shot of your favorite Nikke, but capturing your entire squad in a single, well-composed image? That’s next-level! Group shots are fantastic for showcasing your team synergy, favorite combinations, or just the sheer aesthetic power of your chosen units. I’ve spent hours trying to get that perfect group pose in the Outpost or a specific event stage. The challenge is making sure every Nikke looks good and contributes to the overall image without someone being obscured or looking awkward. My tip for this is to use the Outpost’s various areas. The Command Center, the Cafe, or even just the open spaces offer great opportunities for arranging your Nikkes. Experiment with different camera angles and zoom levels to ensure everyone is visible and in a flattering position. Sometimes, it means moving a shorter Nikke to the front or using the natural environment to create tiers. When you finally get that group shot where everyone looks epic, it feels incredibly rewarding. It’s like getting the whole band together for an album cover!
Fashionista Nikkes: Highlighting Specific Outfits and Skins
Let’s be real, a huge part of Nikke’s appeal is the incredible character designs and, of course, the stunning array of skins! Whenever a new skin drops, my first thought is always, “How can I capture this in the most epic way possible?” Focusing your screenshots on highlighting these specific outfits can be a fantastic theme for your collection. It’s not just about showing off the new look; it’s about appreciating the artistry and detail that went into each design. I always try to find backgrounds that complement the skin’s aesthetic. For a beach-themed skin, obviously, a watery backdrop is perfect. For a more futuristic or edgy outfit, a metallic or neon-lit environment works wonders. Don’t forget to use the Character Model Viewer to zoom in on intricate details, textures, and accessories. I love getting close-ups of specific elements like a unique weapon design or an elaborate hairstyle. These shots become a visual catalog of the game’s amazing fashion, and honestly, they’re some of my most popular posts because everyone loves seeing those gorgeous skins!

Environmental Storytelling: Integrating Nikke and the World
Nikke: Goddess of Victory has such a rich, post-apocalyptic world, and sometimes, the best screenshots are those that integrate the Nikkes within that setting to tell a deeper story. It’s about more than just a character portrait; it’s about showing them interacting with or existing within their environment. I find these types of shots incredibly powerful because they add context and a sense of atmosphere. Think about a lone Nikke standing against a desolate city skyline, or a group of them silhouetted against a setting sun in the desert. These images evoke emotion and curiosity. When I approach this, I often look for distinctive landmarks in battle stages or specific areas in the Outpost that have a strong visual identity. Then, I position my Nikke to interact with that environment – perhaps looking out into the distance, sitting on a bench, or standing defiantly amidst ruins. It’s about creating a narrative in a single frame. The game offers so many beautifully crafted environments; it’s a shame not to use them to elevate your storytelling. It makes your images feel like stills from a blockbuster movie.
Troubleshooting Common Shot Blunders: My Go-To Fixes
Even with all these tips and tricks, believe me, I still run into frustrating issues when taking screenshots. I’ve had countless moments where I thought I had the perfect shot lined up, only to find a glaring flaw later – a blurry Nikke, weird lighting, or grainy textures. It used to make me want to pull my hair out! But over time, through sheer trial and error, I’ve developed a mental checklist of common problems and quick fixes that usually save the day. It’s like having a little toolkit of solutions for those “oops” moments. The truth is, no one gets a perfect shot every single time, and recognizing what went wrong is the first step to fixing it. Don’t let these little blunders discourage you; they’re just opportunities to learn and refine your craft. I’m going to share some of my most frequent headaches and how I tackle them, so you can avoid the same frustrations I went through.
Motion Blur Blues: How to Get Crisp Shots
Oh, motion blur! This was my archnemesis when I first started. I’d be trying to capture a dynamic action pose, and instead, I’d get a blurry streak where my Nikke should have been. It’s incredibly disheartening when you feel like you timed it perfectly, only for the image to betray you. My primary fix for this depends on the context. If it’s a combat skill, first, ensure your game’s frame rate is stable – sometimes an unstable frame rate can lead to visual inconsistencies. More importantly, consider using the screen recording method I mentioned earlier. Record the action, then pause the video at the exact frame where the motion is clearest and take your screenshot from there. This allows you to bypass the instantaneous capture limitations of your device. If you’re in the Outpost or Character Viewer, where things are generally static, but you still get blur, check your device’s performance or any overlay apps that might interfere. For me, taking a few frames of a video and then picking the best one has consistently yielded the sharpest, most dynamic action shots. It really makes a difference!
When the Lighting Fails: Adjusting for Gloomy Scenes
Lighting can make or break a shot, and sometimes, the in-game lighting just isn’t cooperating. You’ll find yourself in a beautifully designed stage, but your Nikke looks strangely dim or washed out, or even worse, hidden in shadows. I’ve experienced this many times, especially in some of the darker story chapters. My first step is always to try and reposition the camera or the Nikke if possible. Sometimes, even a slight shift in angle can catch a better light source. If that doesn’t work, this is where post-capture editing comes in clutch. I’ll open the image in an editor and immediately adjust the brightness and exposure. Sometimes, bumping up the shadows or adding a touch of fill light can bring out details that were previously lost. I also experiment with color temperature – a slightly warmer tone can often make a gloomy scene feel more natural or dramatic. It’s about compensating for what the game environment isn’t providing. Don’t be afraid to brighten things up a bit; you’re not trying to change the game’s art style, just ensuring your Nikke is visible and vibrant within it.
Pixelation Prevention: Getting High-Res Goodness
Nothing grinds my gears more than thinking I have a fantastic shot, only to zoom in and find it’s a blurry, pixelated mess. It’s like seeing all your effort disappear into a blocky abyss! This usually happens when the original capture resolution is too low or if I’ve tried to heavily crop a lower-resolution image. My absolute first step to prevent this is to ensure my in-game “Display Resolution” and “Image Quality” settings are set to their absolute highest. Your device might chug a little, but for screenshots, it’s non-negotiable. If you’re playing on PC via an emulator, make sure your emulator’s resolution settings are also cranked up. Secondly, avoid excessive zooming in-game if your initial capture isn’t high resolution. It’s better to take a wider, higher-res shot and then crop it later in an external editor. I’ve also found that some older devices or slower internet connections can sometimes result in lower-quality textures being loaded, so ensure you have a stable connection and a device capable of rendering the game at its best. High-res captures are the foundation for truly stunning images, so always prioritize getting that crisp initial file. Your Nikkes deserve to be seen in glorious detail!
| Aspect of Screenshot | Common Mistake | Pro Tip (My Go-To Fix) | Why It Matters for AdSense |
|---|---|---|---|
| Composition | Nikke centered, cluttered background. | Utilize the Rule of Thirds; find clean, complementary backdrops. | Engages viewers, encourages longer viewing duration. |
| UI Elements | Health bars, skill icons visible. | Always use the “Hide UI” option or Character Model Viewer. | Creates a professional, shareable image, higher likelihood of external sharing. |
| Clarity/Sharpness | Motion blur, pixelated images. | Record video for dynamic shots, maximize in-game resolution. | High-quality visuals are more appealing, reducing bounce rate. |
| Lighting/Color | Dark, dull, or washed-out scenes. | Post-edit brightness, contrast, and subtle color boosts. | Visually appealing content keeps users on the page, increasing impressions. |
| Storytelling | Random, disconnected captures. | Create thematic collections (squads, skins, environments). | Encourages users to view more of your content, boosting overall engagement. |
Beyond the Basics: Advanced Techniques I Swear By
After you’ve got the fundamentals down – nailing composition, perfecting your settings, and getting those crisp captures – you might start to feel like something’s still missing. I certainly did! I reached a point where my screenshots were good, but I wanted them to be truly exceptional, to have that extra flair that really makes people stop scrolling and admire. That’s when I started experimenting with some more advanced techniques, pushing the boundaries of what I thought was possible with in-game captures. These aren’t overly complicated, but they require a bit more thought and sometimes a creative use of in-game features you might not have considered for photography. It’s about adding a layer of artistry that goes beyond just documenting what’s on screen. These are the little secrets I’ve found that truly make my captures stand out in a sea of other Nikke screenshots, making them not just pictures, but actual pieces of visual storytelling. If you’re ready to take your screenshot game from ‘great’ to ‘OMG, how did you do that?!’, then this section is for you.
Utilizing In-Game Effects: Weather, Time of Day, and Skill VFX
Nikke’s world is incredibly dynamic, with various weather conditions, times of day, and dazzling skill effects. For the longest time, I just let these happen, thinking they were random. But then I realized: these aren’t just background elements; they’re powerful photographic tools! I started actively seeking out stages with specific weather – a gloomy, rainy day can add incredible atmosphere to a serious Nikke, while a bright, sunny afternoon makes colors pop. The time of day, particularly dawn or dusk, can cast beautiful, long shadows and dramatic lighting that is impossible to replicate otherwise. And don’t even get me started on skill visual effects (VFX)! Instead of just capturing the Nikke, try to frame her within her own elemental burst or healing aura. A perfectly timed shot of Privaty surrounded by her explosive effects, or Rupee bathed in her golden skill glow, adds so much dynamism and visual interest. It’s about treating these ephemeral in-game elements as part of your overall composition, using them to enhance the mood and impact of your shot. I always keep an eye out for these opportunities, and they often lead to my most unique and striking captures.
Creating Emotional Impact: Poses and Facial Expressions
A truly great screenshot doesn’t just show a Nikke; it makes you *feel* something. This is where focusing on poses and facial expressions becomes paramount. I’ve spent countless hours in the Character Model Viewer, not just looking for cool angles, but for that specific moment where a Nikke’s eyes convey determination, sadness, joy, or fierce resolve. The game’s artists have put so much detail into these expressions, and it’s a shame to let them go unnoticed. For action shots, think about the peak of emotion – a grimace of effort, a triumphant smile. For more contemplative shots, look for subtle blinks, head tilts, or a soft gaze. Sometimes, just slightly rotating the camera to emphasize the angle of a Nikke’s jaw or the intensity in her eyes can completely change the emotional resonance of the image. It’s about more than just aesthetics; it’s about conveying the Nikke’s inner world. When I manage to capture a shot where the emotion is palpable, those are the ones I cherish the most, and they always get the most engagement because people connect with the feeling.
Creative Cropping and Aspect Ratios: Thinking Outside the Square
While the standard 16:9 or 4:3 aspect ratios are fine, sometimes a more creative approach to cropping can elevate your image and make it stand out. I often experiment with different aspect ratios to achieve a specific artistic effect. For example, a super-wide cinematic crop (like 21:9) can add a dramatic, movie-like feel, especially for environmental shots or group poses. Conversely, a perfect square crop (1:1) can be incredibly effective for portrait-style shots, forcing the viewer to focus on the Nikke’s face or upper body, and it’s great for social media platforms like Instagram. I also play around with “negative space” in my cropping – leaving a lot of empty space around a small subject to emphasize loneliness or scale. It’s about breaking free from conventional framing. Don’t just crop to remove distractions; crop to enhance your storytelling and make your image visually unique. A simple change in aspect ratio can dramatically alter the perception and impact of your screenshot, turning it from a simple capture into a carefully composed piece of art that truly expresses your vision. It really makes people pause and wonder.
Wrapping Things Up
Whew, we’ve covered a ton of ground today, Commanders! From the nitty-gritty of composition to those crucial post-capture tweaks, my hope is that you’re now feeling super charged and ready to make your Nikke screenshots truly unforgettable. I remember when I first started this journey, it felt like an endless climb, but every little tip and trick I picked up genuinely transformed my captures. This isn’t just about taking pictures; it’s about celebrating the incredible artistry of Nikke, expressing your unique vision, and sharing your passion with a community that appreciates every detail. Don’t be afraid to experiment, keep practicing, and most importantly, have fun creating visual masterpieces of your beloved Nikkes!
Useful Information to Know
1. Dive Deeper into Community Showcases: One of the absolute best ways I’ve found to refine my own screenshot game is by immersing myself in what other amazing Commanders are creating. Seriously, platforms like Reddit’s r/NikkeMobile or DeviantArt are goldmines for inspiration. You’ll see innovative compositions, unique perspectives, and creative uses of in-game elements that you might never have considered. I spend a good chunk of my free time just scrolling through these, analyzing what makes a particular shot stand out. Don’t just admire; try to deconstruct the image, asking yourself about the lighting, the pose, the background choice, and the overall mood. Engage with other creators, ask questions, and share your own work to get feedback. The community aspect of Nikke is incredibly vibrant, and it’s a fantastic resource for continuous learning and pushing your creative boundaries. Trust me, you’ll pick up so many nuanced tips just by observing and interacting.
2. Master Free Mobile Editing Apps: You absolutely don’t need expensive software to make your Nikke screenshots shine. In my experience, some of the most powerful and intuitive editing tools are available right on your phone, often for free! Apps like Snapseed, PicsArt, or Adobe Photoshop Express are game-changers. I remember when I first downloaded Snapseed; it completely changed my approach to post-processing. Its selective adjustment tools are a revelation for making specific parts of your Nikke pop without affecting the whole image. PicsArt, on the other hand, offers a more playful suite of filters and overlays if you’re feeling extra creative. These apps allow you to fine-tune brightness, contrast, saturation, and even apply subtle filters that complement your image without overpowering Nikke’s original art style. Get comfortable with one or two of these, and you’ll be amazed at how much polish you can add to your captures, ensuring they look vibrant and professional every single time you share them.
3. Consider the Nikke Creator Program: Did you know that the developers of Nikke, SHIFT UP and Level Infinite, actually have an official Creator Program called CreatorHub? This is a huge opportunity for passionate content creators like us to get recognized and even potentially collaborate with the official team. I’ve always been fascinated by these initiatives because they bridge the gap between players and developers. While I haven’t officially joined yet, I’ve seen many fellow Commanders benefit from it, gaining access to potential early content, exclusive events, and even in-game rewards. If you’re consistently creating high-quality Nikke content, whether it’s screenshots, guides, or fan art, it’s definitely worth looking into the requirements and applying. It’s a fantastic way to elevate your presence within the community, gain further authority and trust, and potentially unlock some exciting new avenues for your creative journey. Who knows, your next viral screenshot might just catch their eye!
4. Optimize for Shareability and Engagement: Beyond just looking good, think about how your screenshots will perform when shared across different platforms. This means understanding aspect ratios and resolutions. While a super-high-resolution image is great for personal archives, an overly large file might be slow to load on social media, potentially hurting engagement. I always try to strike a balance. For Instagram, a perfect square (1:1) or vertical (4:5) crop often performs best, while for X (formerly Twitter) or YouTube thumbnails, a wider 16:9 ratio is usually ideal. Consider adding a subtle watermark with your handle to protect your work and drive traffic back to your channels. Think about eye-catching captions that invite interaction, like asking viewers about their favorite Nikke or their best screenshot tips. The goal isn’t just to get likes; it’s to foster a conversation around your content, which organically boosts visibility and, yes, keeps those AdSense RPMs healthy by encouraging more clicks and longer time on page across your blog posts.
5. Prioritize Your Device’s Performance: This might sound obvious, but I cannot stress enough how much your device’s capabilities impact the quality of your screenshots. A powerful phone or a well-optimized PC client makes a world of difference. I personally experienced a massive leap in quality when I upgraded my phone a while back; suddenly, motion blur was less of an issue, and textures were much crisper. Ensure your game is running at its highest possible graphics settings (Image Quality and Display Resolution) before attempting any serious captures. If you’re on PC, make sure your emulator settings are also optimized for high resolution. Sometimes, simply closing background apps can free up enough resources to prevent stutters or reduced texture quality during intense moments. A smooth, high-fidelity game environment is the canvas for your masterpiece, and the better your canvas, the more stunning your final artwork will be. Don’t let a sluggish device hold back your creative potential; a little optimization goes a long way!
Key Takeaways
At the end of the day, elevating your Nikke screenshot game boils down to a blend of artistic vision, technical know-how, and a genuine passion for the game. I’ve learned firsthand that simply pointing and clicking won’t capture the magic these characters and their world truly offer. It’s about consciously applying compositional rules like the Rule of Thirds, meticulously adjusting in-game settings to hide the UI and maximize visual fidelity, and mastering the art of timing to freeze those dynamic Burst Skills or subtle idle animations. Don’t shy away from post-capture editing; even basic adjustments to brightness, contrast, and color in free mobile apps can significantly enhance your images, making them pop and feel incredibly professional. Most importantly, embrace the storytelling aspect – whether it’s showcasing your favorite squad, highlighting a new skin, or weaving your Nikkes into the rich tapestry of their post-apocalyptic world. Every screenshot is an opportunity to express your unique connection to the game and contribute to the vibrant Nikke community. By consistently applying these principles, you’re not just taking pictures; you’re crafting visual narratives that resonate, engage, and truly celebrate the goddesses of victory.
Frequently Asked Questions (FAQ) 📖
Q: How can I remove the pesky UI elements to get a clean, stunning screenshot of my favorite Nikke?
A: Oh, I totally get this struggle! It’s like you’ve perfectly captured a moment, and then a giant health bar or a chat bubble just ruins the vibe. Been there, done that, and trust me, it’s frustrating!
But here’s the good news, fellow Commander: Nikke actually makes it super easy. When you’re in the game, whether you’re admiring your squad in the lobby or in the heat of battle, just look for a tiny “camera” icon.
It’s usually tucked away in a corner, often the top right or bottom right depending on the screen. Give that little icon a tap, and poof! All the distracting UI elements vanish, leaving you with a pristine, unobstructed view of your Nikke.
Tap it again, and everything comes back. I remember the pure joy when I first stumbled upon this feature; it completely transformed my ability to capture those magazine-worthy shots.
It truly turns your cluttered screen into a beautiful, shareable canvas!
Q: What’s the secret to perfectly capturing those incredibly dynamic skill animations without them looking all blurry or mistimed?
A: This is a question I’ve asked myself countless times, and believe me, it took a lot of experimentation and maybe a few hundred less-than-perfect attempts to crack this code!
Those ultimate skill animations are the heart and soul of Nikke’s visual flair, but trying to snap them at just the right second can feel like an impossible mission.
Here’s my go-to strategy, refined through hours of gameplay: don’t even try to screenshot during the live animation! Instead, use your phone’s built-in screen recording feature.
Just hit record when you’re about to unleash that epic skill, let it play out, and then go into your phone’s gallery. You can then scrub through the recorded video frame by frame, find that absolutely perfect, jaw-dropping moment, and take a screenshot directly from the video.
This method gives you total control over the timing and ensures you get a sharp, crisp image every single time. It’s a tiny bit of extra effort, but the difference in quality is absolutely immense and totally worth it for those iconic shots!
Q: Beyond just clearing the UI, what are some insider tips to make my Nikke screenshots truly ‘gallery-worthy’ and elevate them to the next level?
A: Ah, now we’re talking about the art of it all! Once you’ve mastered the clean shot, it’s time to think like a pro photographer. In my experience, it’s all about composition and a little bit of flair.
Don’t just settle for a straight-on, centered shot. Try playing with different angles—maybe a slightly low shot to emphasize a Nikke’s power, or a close-up on a particular detail like their intricate weapon or a poignant expression.
I’ve found that waiting for the perfect background element, like an explosion or a ray of light, can dramatically enhance the shot. And don’t shy away from simple post-processing!
A quick tweak of brightness, contrast, and maybe a touch of color saturation in your phone’s default photo editor can make a monumental difference. I always give my shots a little boost to make the colors really pop.
Remember, you’re not just taking a picture; you’re telling a micro-story. Experiment with zooming in on a Nikke’s eyes during a powerful moment to capture their emotion, or frame them against a striking landscape.
You’ll be amazed at how much more impactful your screenshots become with just a few thoughtful adjustments!